Social network analysis with NetworkX
Introduction
In this tutorial, we will show you how to perform simple network analysis with the NetworkX library and data stored in Memgraph. You will also acquire a basic understanding of Query Modules, an easy method for extending the query language with user-written procedures.
Data model
We are going to use the Karate Club graph, a network of friendships between 34
members of a karate club at a US university, as described by Wayne Zachary in
1977. It is a very popular data set in social network analysis and is very often
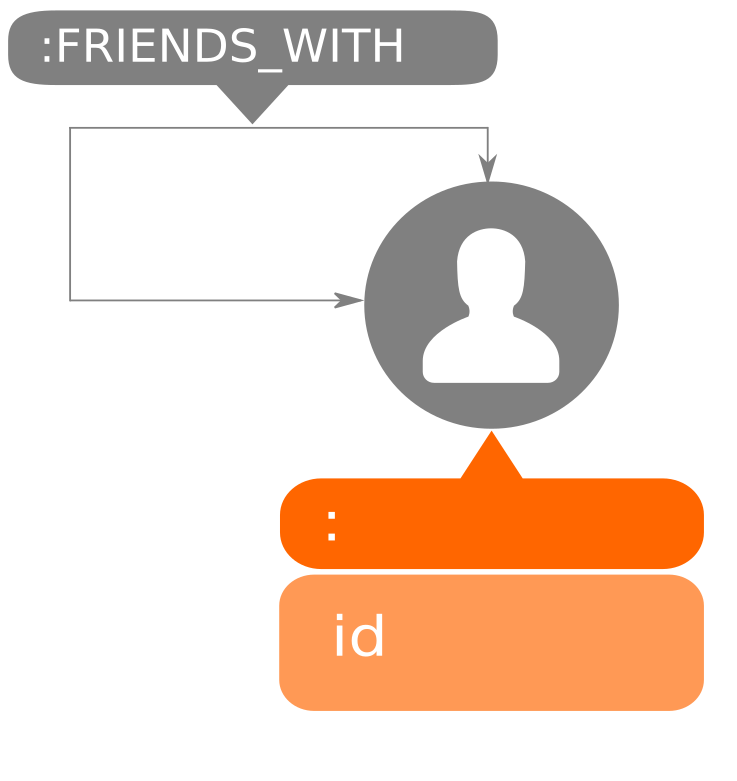
referenced in such tutorials. The nodes in the graph represent the members while
the relationships between them are of type FRIENDS_WITH. You can differentiate
the nodes by using their unique id property.
Importing the dataset
To import the dataset, download the Memgraph
Lab desktop application and navigate to the
Datasets tab in the sidebar. From there, choose the dataset Karate club
friendship network and continue with the tutorial.
Using existing NetworkX algorithms
There are three ways to execute queries and procedures in Memgraph:
- using the command-line tool
mgconsole, which comes with Memgraph: Querying the database - programmatically, by using the Bolt protocol: Building applications
- from Memgraph Lab, a visual user interface which you can download here.
In this tutorial, we are using results from the command-line tool because of their text format but, it's alright to use Memgraph Lab instead. You can open Memgraph Lab and in the tab Query execute the following command:
MATCH (s)-[r]-(t)
RETURN s, r, t;
This is going to return all the relationships inside our network. Now we have a better overview of what we are dealing with, so it’s time to get some useful information about the network.
To analyze the network we will use the built-in procedure analyze() from the
graph_analyzer query module. This module utilizes the NetworkX library to
retrieve graph information. Run the following query:
CALL graph_analyzer.analyze() YIELD *;
You will get details about the graph like the number of nodes, edges, bridges... and many more.
Betweenness centrality
Now let's try to find the betweenness centrality of a node, i.e. the number of times a node acts as a bridge along the shortest path between two other nodes. Run the following query:
CALL nxalg.betweenness_centrality() YIELD *;
The procedure betweenness_centrality() is one of over 70 algorithms available
in the nxalg module.
The result should be:
+--------------+--------------+
| betweenness  | node         |
+--------------+--------------+
| 0            | ({id: "0"})  |
| 0.000473485  | ({id: "1"})  |
| 0.0083649    | ({id: "2"})  |
| 0.00189394   | ({id: "3"})  |
| 0            | ({id: "4"})  |
| 0.000473485  | ({id: "5"})  |
| ...          | ...          |
Link prediction
A very common problem in network analysis is link prediction. The algorithm
predicts which new interactions among the network members are likely to occur in
the near future. One way of predicting these links is by measuring the
“proximity” of nodes in a network. This can be done by using the Jaccard
coefficient. Let's try running the algorithm on a node with the id 13 and
ordering the results descending by the value of the coefficient:
CALL nxalg.jaccard_coefficient()
YIELD *
WITH  u, v, coef
WHERE u.id = '13'
RETURN u, v, coef
ORDER BY coef DESC;
The results are:
+--------------+--------------+--------------+
| u            | v            | coef         |
+--------------+--------------+--------------+
| ({id: "13"}) | ({id: "19"}) | 0.6          |
| ({id: "13"}) | ({id: "17"}) | 0.4          |
| ({id: "13"}) | ({id: "21"}) | 0.4          |
| ({id: "13"}) | ({id: "28"}) | 0.333333     |
| ({id: "13"}) | ({id: "30"}) | 0.285714     |
| ({id: "13"}) | ({id: "27"}) | 0.285714     |
| ({id: "13"}) | ({id: "31"}) | 0.222222     |
| ({id: "13"}) | ({id: "15"}) | 0.166667     |
| ({id: "13"}) | ({id: "14"}) | 0.166667     |
| ({id: "13"}) | ({id: "18"}) | 0.166667     |
| ({id: "13"}) | ({id: "20"}) | 0.166667     |
| ({id: "13"}) | ({id: "22"}) | 0.166667     |
| ({id: "13"}) | ({id: "26"}) | 0.166667     |
| ({id: "13"}) | ({id: "32"}) | 0.133333     |
| ({id: "13"}) | ({id: "29"}) | 0.125        |
| ({id: "13"}) | ({id: "23"}) | 0.111111     |
| ({id: "13"}) | ({id: "25"}) | 0            |
| ({id: "13"}) | ({id: "24"}) | 0            |
| ({id: "13"}) | ({id: "16"}) | 0            |
+--------------+--------------+--------------+
Adding new NetworkX algorithms as query modules
Memgraph comes with over 70 NetworkX algorithms, but if the algorithm you require is missing, you can add it yourself as a Query Module.
If you are using Docker to run Memgraph you need to create a volume and mount it
to access the directory /usr/lib/memgraph/query_modules. This can be done by
creating an empty directory ~modules on your host machine and executing the
following command:
docker volume create --driver local --opt type=none --opt device=~modules --opt o=bind modules
Now, you can start Memgraph and mount the created volume:
docker run -it --rm -v modules:/usr/lib/memgraph/query_modules -p 7687:7687 memgraph
Everything from the directory /usr/lib/memgraph/query_modules will be
visible/editable in your mounted volume and vice versa.
Community detection
Detecting communities in a network is a very common problem. Therefore, we need
community detection algorithms that can partition the network into multiple
communities. Let's create our own module that accomplishes this task. Create a
file called communities.py in the ~modules directory and copy the following
code into it:
import mgp
import networkx as nx
from networkx.algorithms import community
from mgp_networkx import MemgraphDiGraph


@mgp.read_proc
def detect(
    ctx: mgp.ProcCtx
    ) -> mgp.Record(communities=mgp.List[mgp.List[mgp.Vertex]]):

    networkxGraph = nx.DiGraph(MemgraphDiGraph(ctx=ctx))
    communities_generator = community.girvan_newman(networkxGraph)

    return mgp.Record(communities=[
        list(s) for s in next(communities_generator)])
We just created a query module with the procedure detect() that utilizes the
Girvan–Newman method to find communities in a graph. Before we can call it, the
newly created query module has to be loaded:
CALL mg.load_all();
And now it can be called:
CALL communities.detect()
YIELD communities
UNWIND communities AS community
RETURN community
The resulting communities are:
+-------------------------------------------------------------------------------------------------------------------------------------------------------------------------------------------------------------------------------------------------------------------------+
| community                                                                                                                                                                                                                                                               |
+-------------------------------------------------------------------------------------------------------------------------------------------------------------------------------------------------------------------------------------------------------------------------+
| [({id: "0"}), ({id: "1"}), ({id: "3"}), ({id: "4"}), ({id: "5"}), ({id: "6"}), ({id: "7"}), ({id: "10"}), ({id: "11"}), ({id: "12"}), ({id: "13"}), ({id: "16"}), ({id: "17"}), ({id: "19"}), ({id: "21"})]                                                             |
| [({id: "2"}), ({id: "8"}), ({id: "9"}), ({id: "14"}), ({id: "15"}), ({id: "18"}), ({id: "20"}), ({id: "22"}), ({id: "23"}), ({id: "24"}), ({id: "25"}), ({id: "26"}), ({id: "27"}), ({id: "28"}), ({id: "29"}), ({id: "30"}), ({id: "31"}), ({id: "32"}), ({id: "33"})] |
+-------------------------------------------------------------------------------------------------------------------------------------------------------------------------------------------------------------------------------------------------------------------------+
Further reading
If you want to find out more about query modules, take a look at our guide on how to create your own: Implement custom query modules.
You can also visit our NetworkX Reference guide to find out which NetworkX algorithms are already available in Memgraph.